How to update my module?
First of all, do not EVER uninstall your module before updating it. You may loose data but don't worry, the new version of the module will take care of replacing the files that have to be replaced and will take responsability for keeping your data.
Moreover, ALWAYS make sure you make a backup of your files old version before updating your module. This is very important especially if your webmaster has done some integration work and modified templates and CSS files. If this is the case, once the new module version is set up, DO NOT REPLACE the new files with the old ones (those you have made customised) but ask your webmaster to apply again the modifications one by one into the new files.
Update of a module purchased on PrestaShop Addons platform
Once you have purchased a product, access its updates as follows:
In your PrestaShop back-office, click on the "Module Manager" menu and log in to your Addons account:
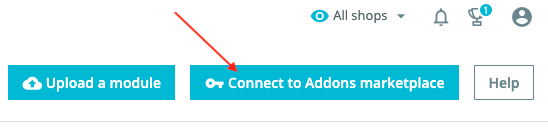
Wait for the message confirming your connection to appear.
Find the module you want to update and click on the "Upgrade" button. Then configure your module new version as you want.
BE CAREFUL: don't forget to click on "Configure" on the module line, to load all the module novelties (new tables in database, new variables to be fill in, etc...), otherwise the module won't be fully effective and you may see errors in the front office.
Update of a module not purchased on PrestaShop Addons platform
If in your PrestaShop back-office, you see the "Upgrade" button for a module that you have not purchased on Addons, don't click on it because nothing will happen since you don't have purchased it on Addons.
Follow the following procedure instead:
If you are still under your free updates period:
Login to your account on our site and go to the "My modules" section to access the list of your purchased licenses. At the module level, click on the "Download" button to download the latest version of the module:
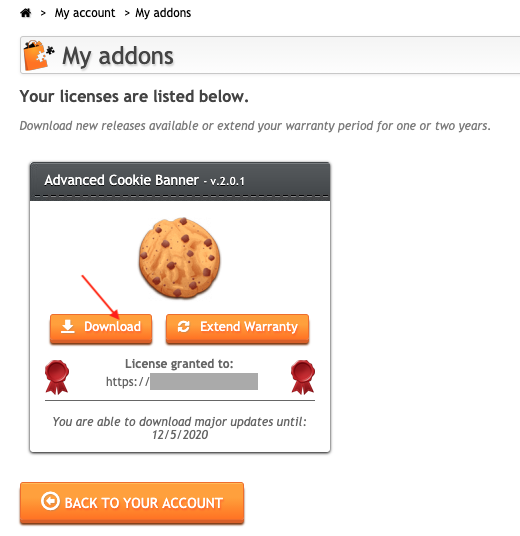
As long as you are covered by your warranty period, you can download the latest major updates of the module. When you are out of warranty, a "You can't download major updates" message will appear. However, you will always have access to minor updates.
Once the zip of the new module version saved in your computer, you can:
- Either use your PrestaShop back office (recommended)
Go to your PrestaShop back-office and click on "Modules and Services" menu. At the top right of the page, click on "Add a new module" (or "Upload a module" for PrestaShop 1.7 versions). This is actually not a strictly speaking "new" module, since you already had it on your shop, but that's how it should be done.
A "add a new module" badge opens (or a pop-up for the 1.7 versions). Click on "Choose a file" (or "Select file" for 1.7 versions) and look for the zip file of the latest module version, at the place where you saved it in your computer.
Then click on "Upload this module" (for the 1.7 versions, you don't need to click a button, the installation is automatically done). A message indicating that the download has been successfully made appears.
The module has been updated and the new version has replaced the old one automatically.
BE CAREFUL: don't forget to click on "Configure" on the module line, to load all the module novelties (new tables in database, new variables to be fill in, etc...), otherwise the module won't be fully effective and you may see errors in the front office.
- Either use your file transfer protocol (FTP)
Unzip the new version of the module in the folder of your choice on your computer.
Launch Filezilla or your favorite FTP program. Filezilla can be downloaded for free by clicking here. Set it up and configure it. You will need to enter your hostname (web site address or IP address), FTP username and password. If you don't already have them, you need to get these from your web host, but typically these always get sent to you by your web host when you purchase your hosting plan.

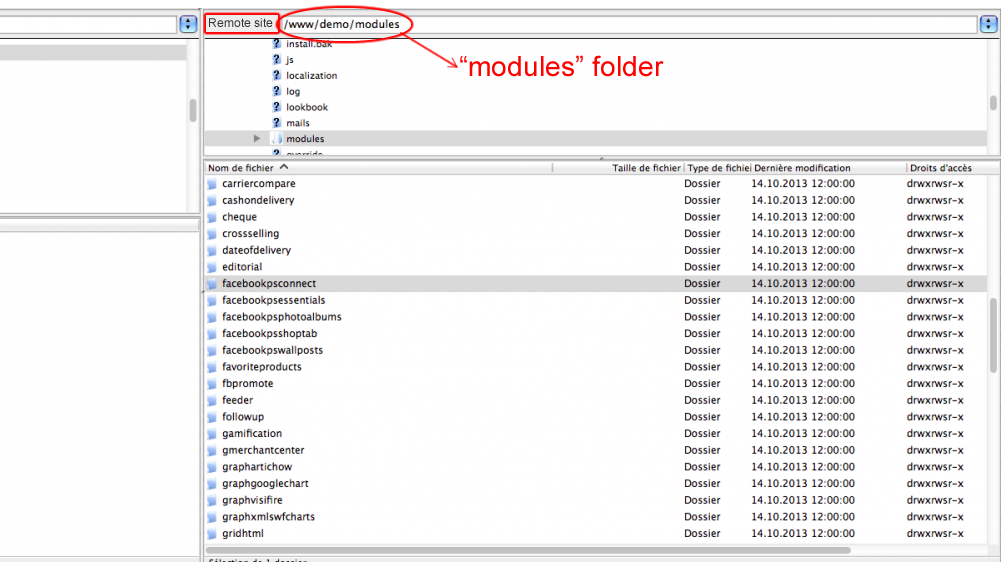
Once you're connected, in the window on the right ("remote site" window) go to your PrestaShop "modules" folder:
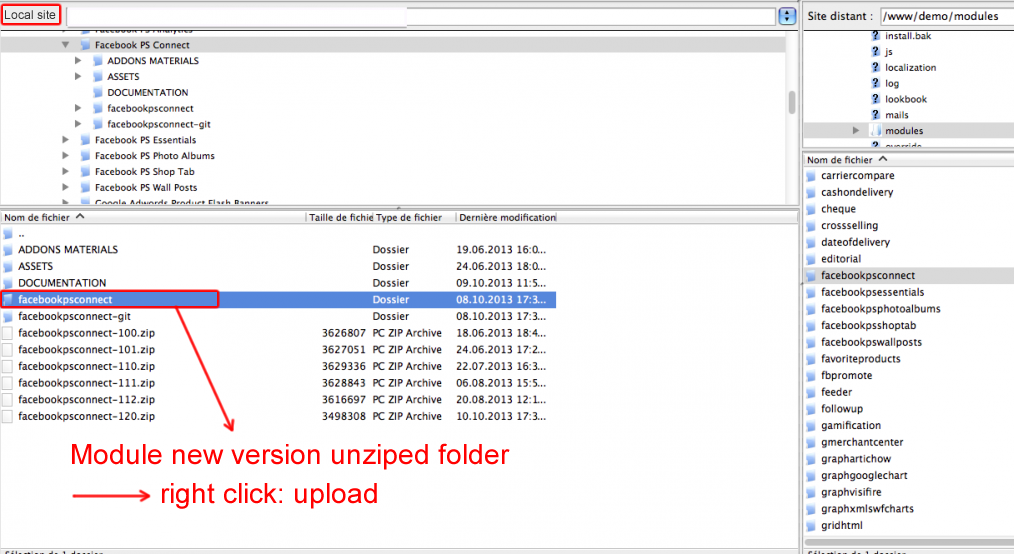
Then in the window on the left ("local site" window) find the unziped folder of the module new version. Right click on this folder and select "Upload" in the contextual menu.
Then go to your PrestaShop back-office and in the "Modules and Services" tab find the module you just downloaded in the modules list (use the browser by indicating the title of the module).
On the line matching with the module, click on "configure".
BE CAREFUL: don't forget to click on "Configure" on the module line, to load all the module novelties (new tables in database, new variables to be fill in, etc...), otherwise the module won't be fully effective and you may see errors in the front office.