How do I organise menu tabs, columns, item groups and items?
The menu has four levels: tab → column → item group → item. The submenu is the area that opens from a tab; it is not a fifth level to create.
Create the levels in order
Open Menu configuration. In multi-shop mode, first choose the context in which you want to create the menu.
- Create a tab: this is the main entry visible in the menu bar.
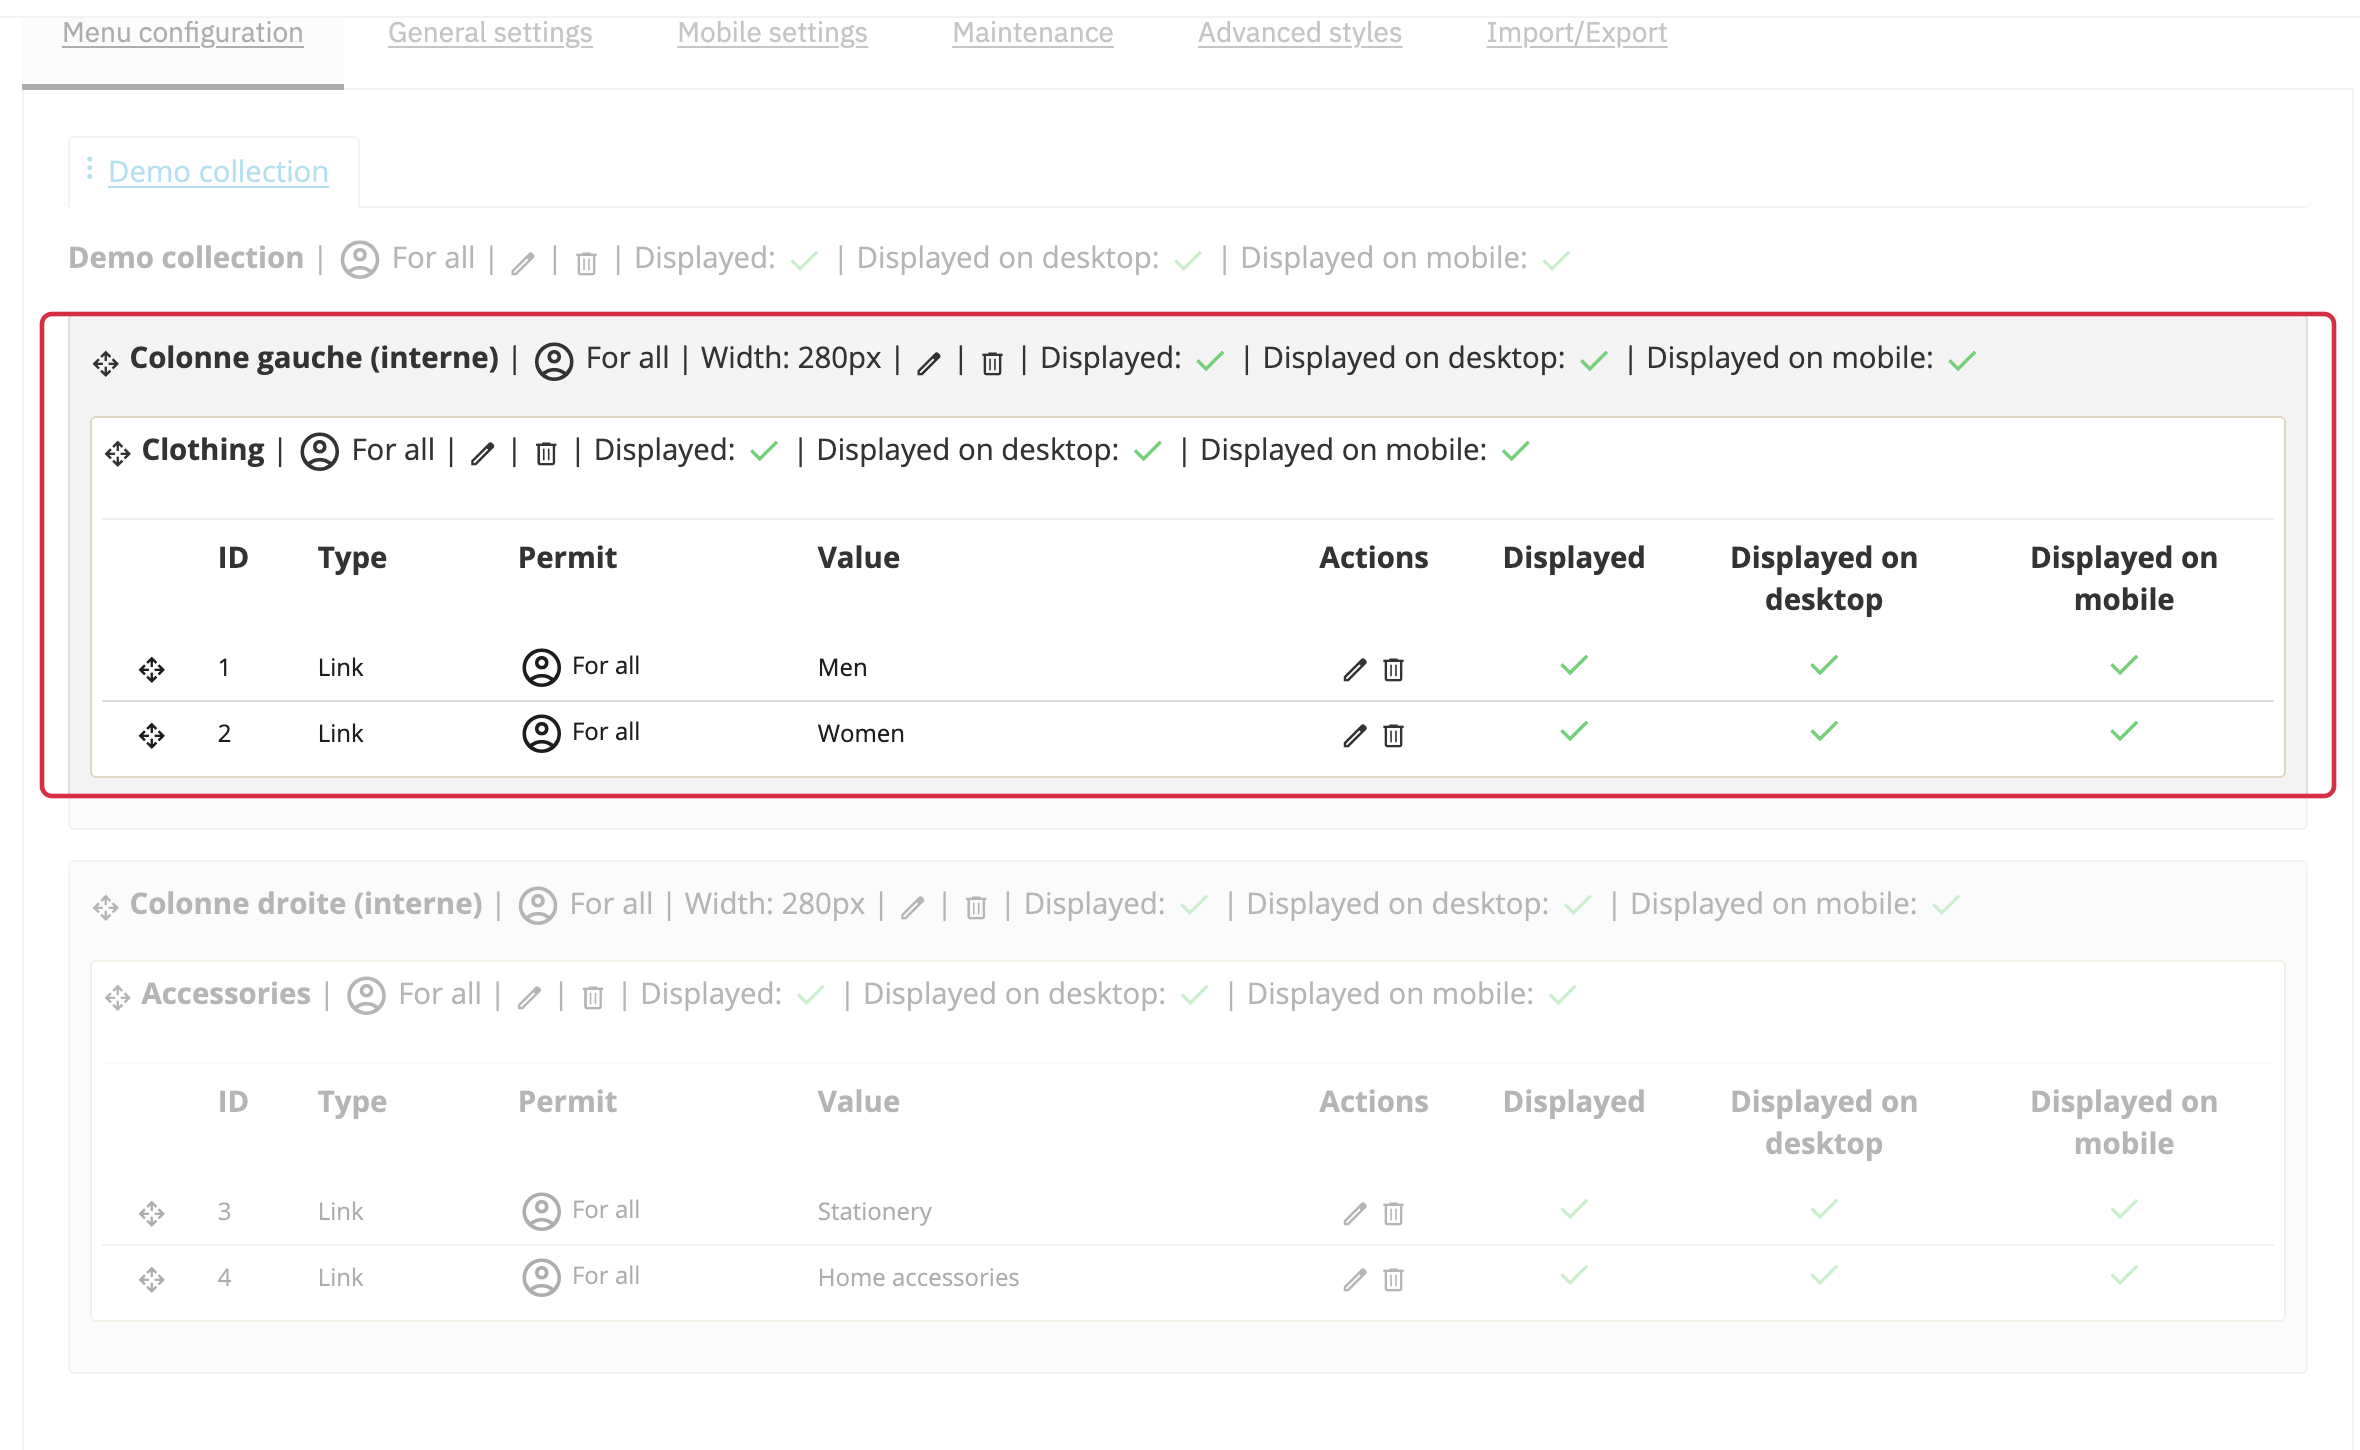
- Add a column and select that tab as its parent. Its title is an internal back-office label; it is not displayed in the shop.
- Add an item group: select the tab and then the parent column. To display a heading in the column, enter a title for this group.
- Add items to their parent group. Each item is an entry in the submenu.
Save each level before creating the next one. Use the available drag handles to reorganise the menu, then check the result in the shop.
Example: a “Demo collection” tab
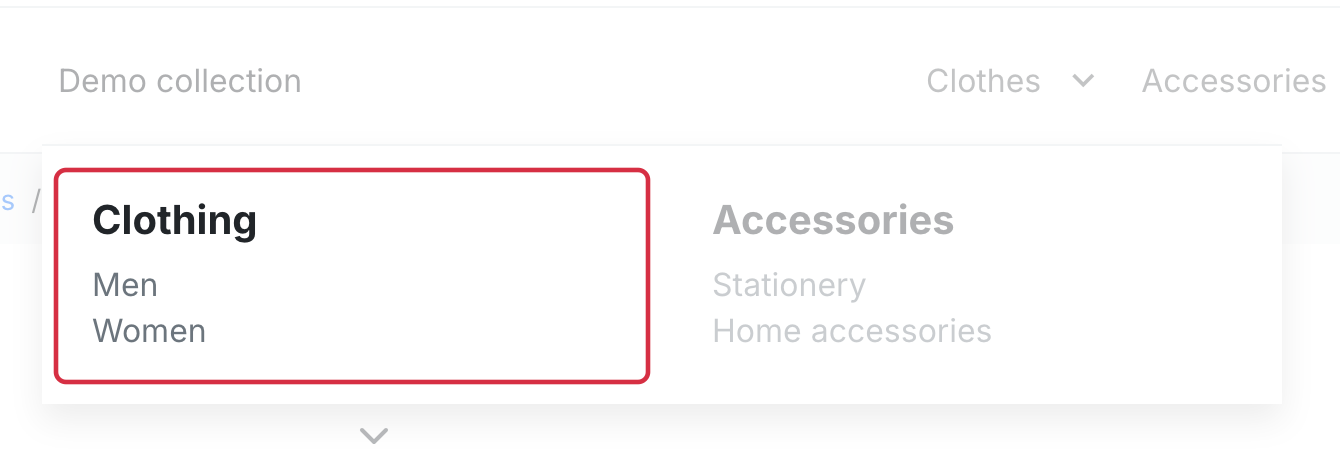
Create a “Demo collection” tab, then add a first column. Inside this column, create a group called “Clothing” and add two items, “Men” and “Women”, linked to the corresponding categories in your catalogue. In the shop, the submenu displays the “Clothing” group and its two links; the column title remains a back-office label.
For a second column under “Demo collection”, create an “Accessories” group with “Stationery” and “Home accessories” items. The storefront submenu then has two columns. Use destinations that exist in your own catalogue.
Choose destinations, titles and images
Select a destination type offered in the form, then the corresponding page, category or other resource. A custom title replaces the destination title: enter it in each relevant shop language.
The Product type is available for item groups, with options to display the title and price. The available types therefore differ between tabs, groups and items.
You can pick an icon or upload an image per language, then enter its image legend. Supported formats are GIF, JPG/JPEG, PNG, SVG and WebP.
For an entry that should not open a page, use Prevent click on link and keep the # added to the link field. The target setting allows you to open a link in the same window or a new window.
Additional text areas let you place content above or below columns and groups, for example a promotional message.
Check visibility
Set Active, Active on desktop, Active on mobile and permissions for the affected objects. Check their parents too: an active item remains hidden if its group, column or tab is hidden.
In multi-shop mode, read how to create a shared menu, edit a shared menu and add a shop before changing shared objects.
Generate a submenu from categories
For a Category tab, select the category, enable Include Subcategories and choose how many columns to create. The module distributes entries during generation.
For an existing tab, “Rebuild tree” deletes its columns and their contents before recreating them. Customisations in this part of the menu may be lost. Export the menu before this operation; see the export and migration procedure to keep a copy.