How to create a menu shared between several shops?
In multistore mode, choose the shop context before creating the menu tabs.
- In the shop selector at the top of the PrestaShop back office, select All stores to share the menu across all existing shops, or select the relevant shop group.
- Open the module configuration, then Menu configuration.
- Create the tabs and their columns, item groups and items in that context. See the guide to menu levels if needed.
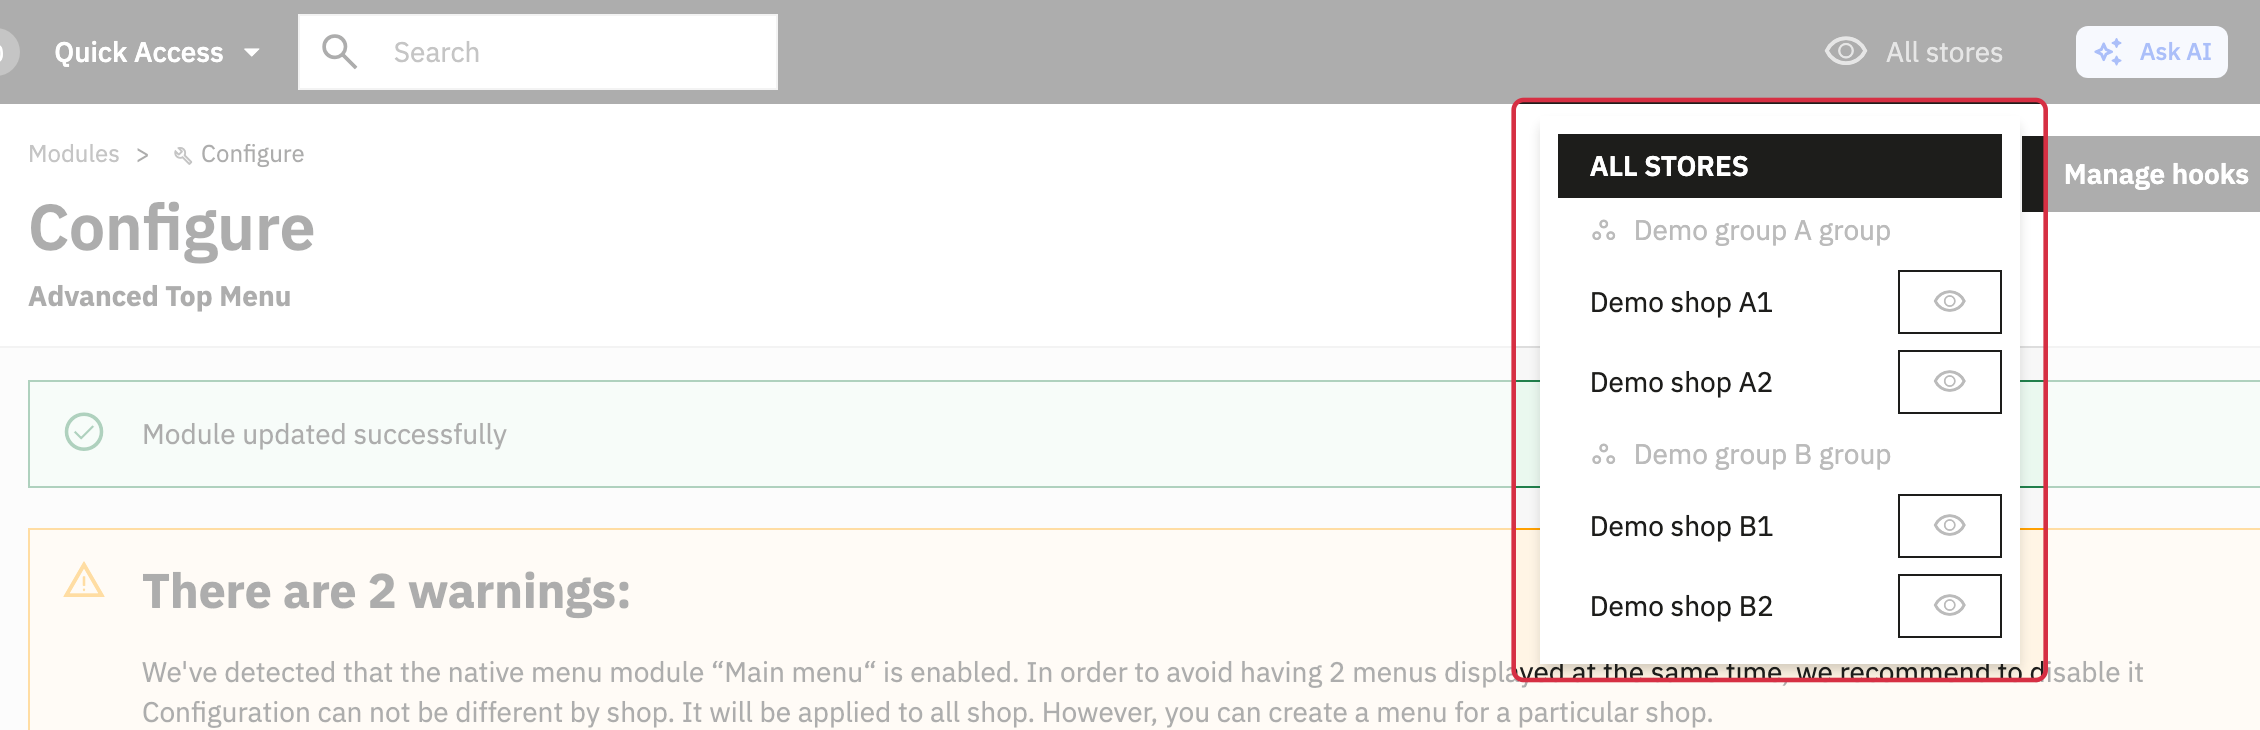
For example, with four shops divided into two groups, All stores associates new tabs with all four shops. Selecting the second group associates them only with the shops in that group.
In this example, the selector shows Demo group A and Demo group B, each containing two stores. The active All stores context creates tabs shared by all four stores; select Demo group B to limit new tabs to its B1 and B2 stores. Depending on your PrestaShop version, the all-store context may be labelled All shops.
These objects are shared: editing them can affect every shop they are associated with, even from a single-shop context. Read the FAQ about editing a shared menu before customising them.
Then check the menu in each shop: visibility also depends on its configured position, the theme and permissions. If needed, follow the display checks.
Check separately when adding another shop later: see the FAQ about adding a shop.